实现直播
更新时间:2021-05-25
概述
本篇文章,主要介绍了在集成 SDK 后,如何实现基本的直播功能。
前提条件
首先需要在 开发者平台 注册账号,创建应用,然后获取 SDK 鉴权需要的 appID 和 appSecret,在实现直播之前,请确认您已完成以下操作:
跑通示例代码
示例代码包含了基本的接入示例可供接入进行参考,帮助开发者快速接入SDK。
-
在 示例代码下载页面 下载用于集成参考的 Demo 源码工程。
-
在
app/src/main/res/values/strings.xml文件中配置 AppID和AppSecret。<!-- Replace with your own AppID --> <string name="linklive_app_id">YOUR APPID</string> <!-- Replace with your own AppSecret --> <string name="linklive_app_secret">YOUR AppSecret</string> -
运行工程。
示例代码说明
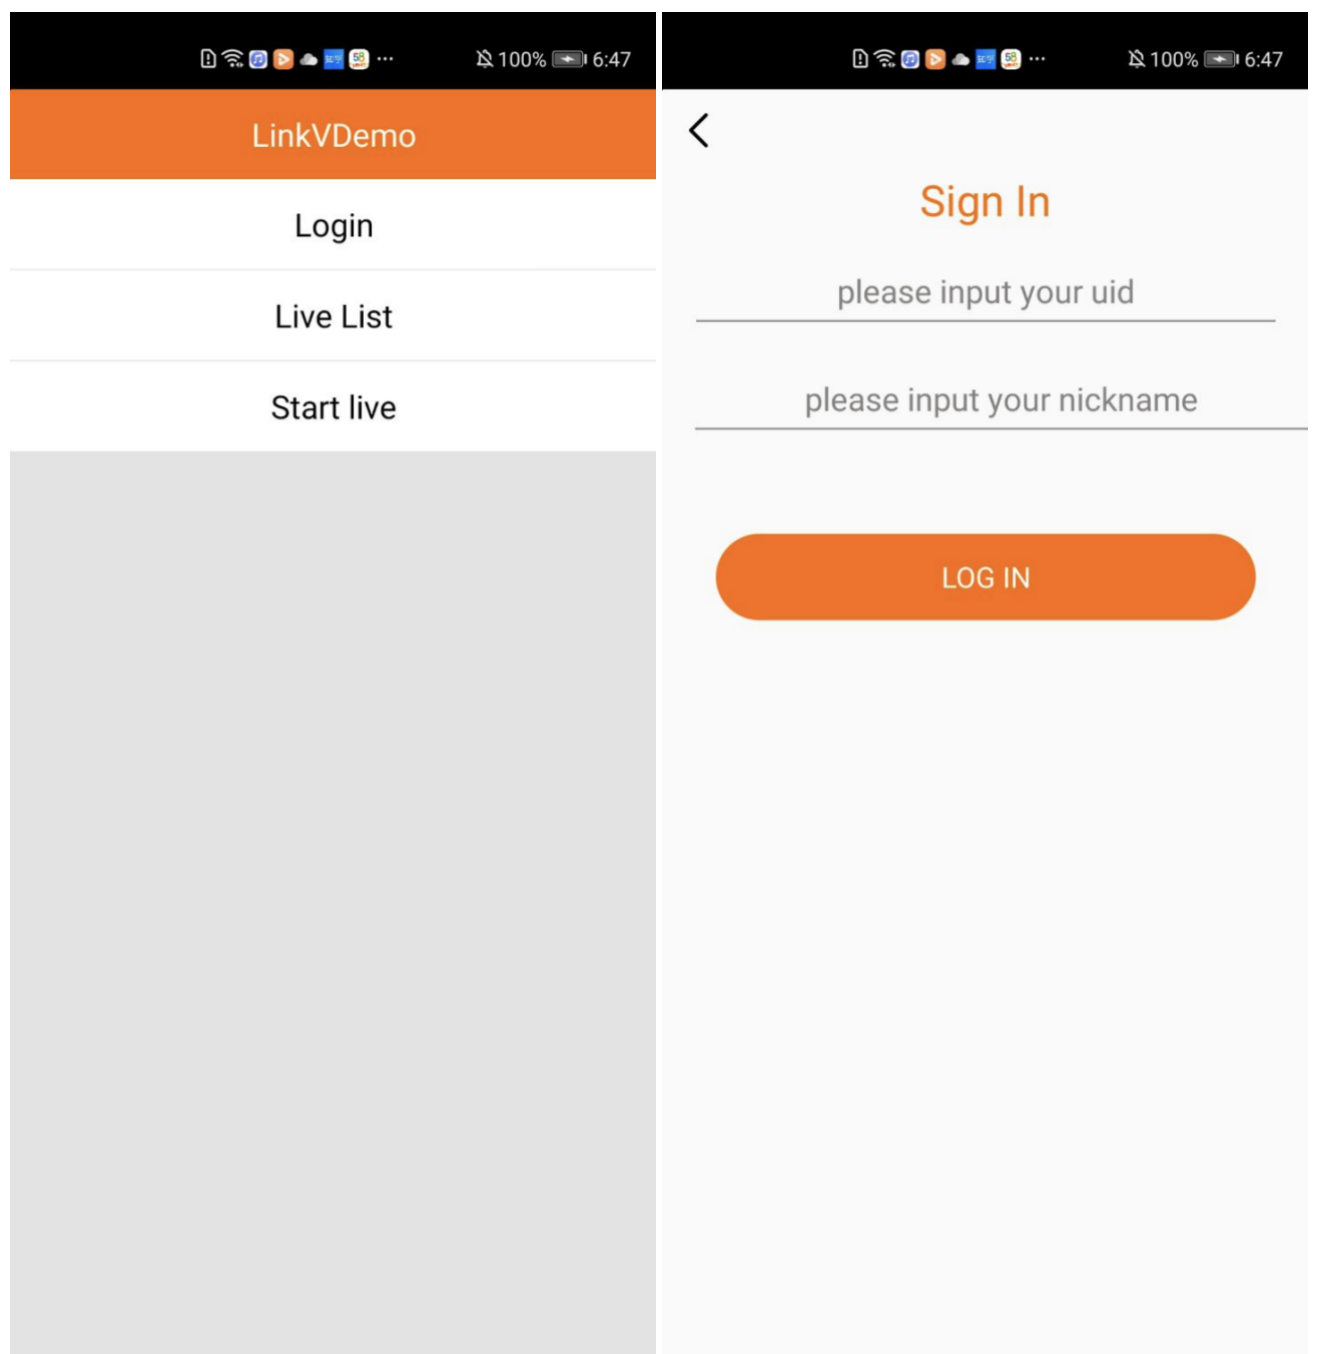
Demo 提供了测试登录的功能,可任意输入 name 和 uid 进行登录,点 Login 进入测试登录页面。
实际接入SDK过程中,这一步是由接入方服务端与LinkV服务端进行交互后获取到 token 和 openID,然后调用客户端SDK的 onLoginSuccessWithOriginUid 接口进行绑定登录。
登录成功后,点击 Live List 可进入直播列表页。
测试登录功能说明
APP 有一套自己的账号系统,SDK 有一套自己的账号系统,LinkV 提供了账号绑定的功能,在接入方自己 APP 登录后,拿到用户id, 昵称,头像信息等,然后通过服务端 SDK server to server 的交互 拿到 openID 和 token 后 传递给SDK 才能完成登录功能。
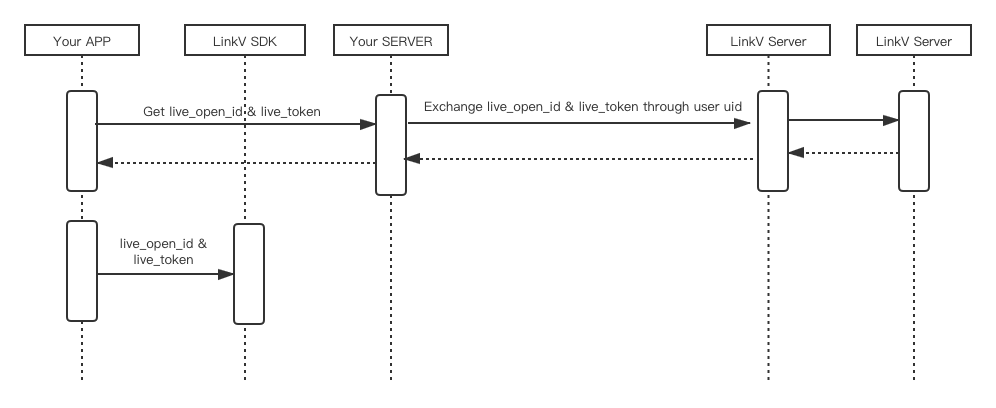
示例代码中提供了 LinkVExampleLogin.java 用于在接入服务端 SDK 完成 server 对接之前,模拟 server to server 获取 token 的过程,调用SDK的测试登录 bindingTokenWithUid 接口,直接拿到 测试 token 进行完成登录。
 // Debug environment available only, in a production environment, you need to request user information from your server.
 LinkliveSDK.getInstance().bindingTokenWithUid(uid,name, new LoginGetTokenWrapper.OnBindingTokenListener() {
     @Override
     public void onRequestSuccess(String originUid, String openId, String token) {
         //Get token login
         LinkliveSDK.getInstance().onLoginSuccess(originUid, openId, token);
         //Jump page
         startActivity(new Intent(DevelopmentLoginAct.this, MainActivity.class));
         finish();
     }

     @Override
     public void onRequestFail(String msg) {
         hideLoading();
         showToast("Login failed");
     }
 });
初始化
- 在
Application的onCreate方法中设置SDK监听回调对象。 - 设置完成SDK监听回调后,调用 SDK 初始化函数
initSdk,对 SDK 进行初始化操作。 - 实现必备接口
agreePrivacyPolicyWithCompletion隐私协议授权方法。
初始化SDK
1. 设置SDK监听回调对象
在使用 SDK 之前需要设置 SDK 监听回调,创建一个类(例如:LinkliveImpl)继承LinkliveInterfaceAbs类。
调用示例:
public class LinkliveImpl extends LinkliveInterfaceAbs {

}
创建完成后调用setLinkliveInterface方法进行设置SDK的监听回调。
调用示例:
public class MyApp extends Application {
    @Override
    public void onCreate() {
        super.onCreate();
        //Set SDK callback
        LinkliveSDK.getInstance().setLinkliveInterface(new LinkliveImpl());
    }
}
2. initSDK 初始化SDK
从开发者平台 拿到appID和appSecret传入initSDK方法中,进行初始化SDK。
- 调用示例
public class MyApp extends Application {

    @Override
    public void onCreate() {
        super.onCreate();
        //Set SDK callback
        LinkliveSDK.getInstance().setLinkliveInterface(new LinkliveImpl());

        //The appid and app_secret are obtained after the application is created by registering the developer platform. The appid and app_secret below are for testing purposes only
        String appID = getResources().getString(R.string.linklive_app_id);
        String appSecret = getResources().getString(R.string.linklive_app_secret);
        //initSDK
        LinkliveSDK.getInstance().initSDK(this, appID,appSecret ,new TokenCallback() {
            /**
             * Token invalid callback
             * @param url
             * @param status
             * @param rawResponse
             */
            @Override
            public void onTokenExpire(String url, int status, String rawResponse) {

            }
            /**
             * Call back this function when the current user is blocked in the live broadcast room.
             */
            @Override
            public void onUserBlocked() {

            }
        });
    }
}
实现必备回调方法
- 因为在观看直播和开播功能中会对当前的隐私协议授权状态做校验,没有得到授权会影响以上功能的使用,如果想要正常使用 SDK 中的全部功能需要在 agreePrivacyPolicyWithCompletion 方法返回正确的隐私协议授权状态。
- 调用示例
public class LinkliveImpl extends LiveMeLiveInterface {
   /**
     * Authorize the privacy agreement
     * @param activity
     * @param confirmCallback
     */
    public void agreePrivacyPolicyWithCompletion(Activity activity, OnTermConfirmCallback confirmCallback) {
        //Example
        confirmCallback.onTermConfirm(true);
    }
}
添加直播页
//Get live data  Fragment
Fragment  homePageFra = LinkliveSDK.getInstance().fetchVideoListFragment(this, findViewById(R.id.layout_root));

//Add to container

FragmentManager fragmentManager = getSupportFragmentManager();

FragmentTransaction transaction = fragmentManager.beginTransaction();

transaction.add(R.id.layout_root, homePageFra);

transaction.commitAllowingStateLoss();